The short answer
A block paving driveway is laid in a fixed sequence: excavate to the right depth, set the falls so water runs away from the house, lay and compact a MOT Type 1 sub-base (commonly 100–150mm for a driveway), set concrete edge restraints on haunching, screed a sharp sand laying course (around 30–50mm), lay the blocks to your chosen pattern off the screeded sand, cut the edges, then vibrate the blocks in with a plate compactor over a rubber mat. Finally, kiln-dried sand is brushed into the joints and the blocks are vibrated again so the sand locks them together. Getting the sub-base and falls right is what makes a driveway last.
Every durable block paving driveway follows the same order of operations. Skipping or rushing the groundwork stages is the usual reason a drive sinks, ruts or floods later.
Laying sequence
- Sub-baseMOT Type 1, ~100–150mm
- Laying courseSharp sand, ~30–50mm
- EdgesConcrete restraints on haunching
- JointsKiln-dried sand
- Key ruleFalls away from the house
Excavation, falls and edge restraints
The job starts with excavation (the dig-out). You remove topsoil and any soft ground down to a firm formation, deep enough to take the sub-base, laying course and the blocks themselves while finishing at the right level — typically at least 150mm below the damp-proof course of the house. At this stage the installer also sets the falls: a gentle slope, often around 1:40 to 1:60, so surface water runs to a gully, channel drain or permeable border rather than towards the building. A geotextile membrane is usually laid over the formation to stop the sub-base mixing into soft subsoil. Concrete edge restraints (kerbs or edging blocks) are then bedded on a concrete haunch around the perimeter; without them the paving spreads and the joints open up over time.
Sub-base and laying course
The sub-base is the structural heart of the driveway. Crushed stone — almost always MOT Type 1 — is laid in layers and compacted with a vibrating plate or roller. For a domestic driveway the compacted sub-base is commonly 100–150mm thick, more on soft or clay ground. It must be firm, even and follow the falls, because the blocks above only spread load; they do not bridge a weak base. On top of the compacted sub-base goes the laying course: a screeded bed of sharp (grit) sand, typically 30–50mm deep once consolidated. This is screeded flat with rails and a straightedge but not compacted before laying — the blocks are pressed into it later. The screeded sand should be tightly controlled, because dips here show through as a wavy finished surface.
Laying, cutting and jointing the blocks
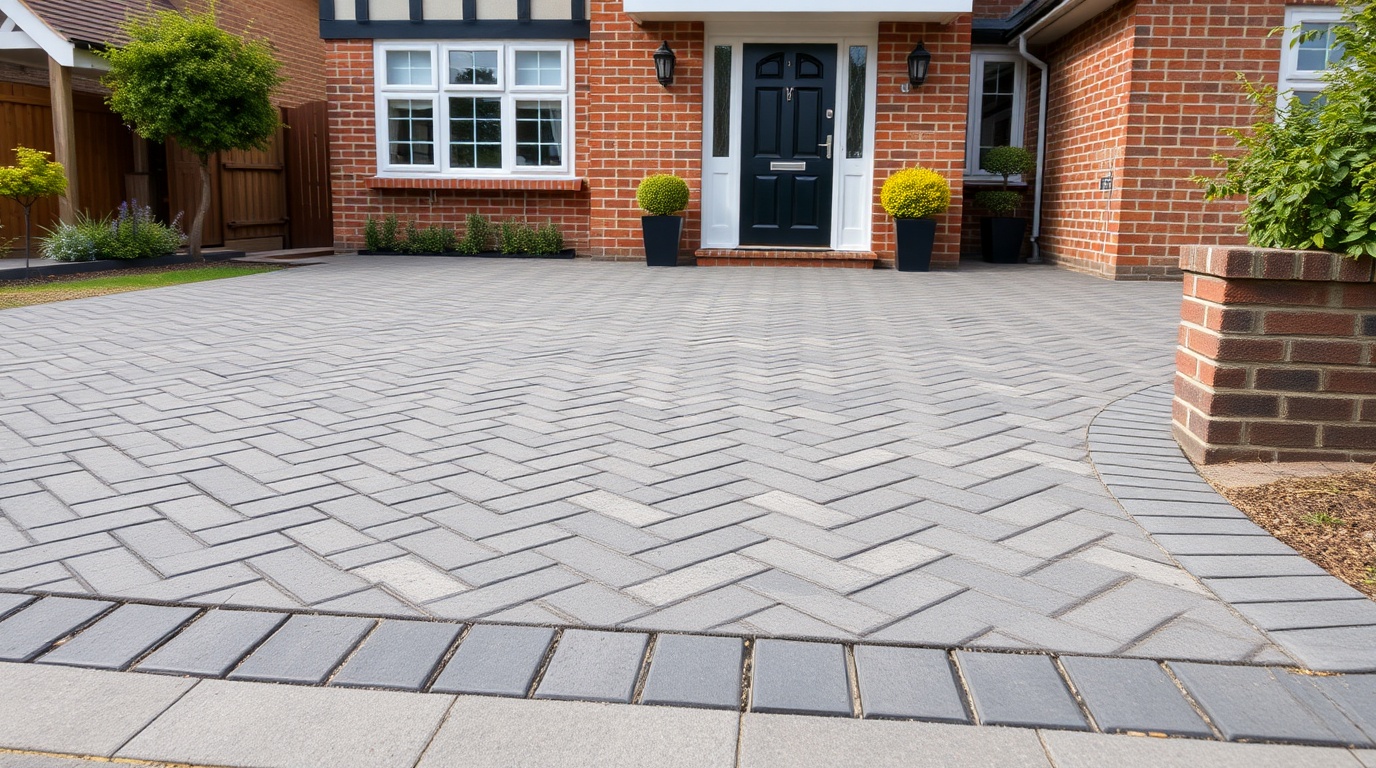
Blocks are laid working off the laid paving, not off the screeded sand, so the bed stays undisturbed. They are placed hard against each other in the chosen pattern — herringbone (45° or 90°) is favoured on driveways because it interlocks and resists the twisting forces from car tyres better than stretcher bond. Edge and curved areas are cut with a block splitter or a disc cutter to fill gaps neatly; small slivers are avoided as they work loose.
- First compaction: once an area is laid and cut in, a plate compactor with a rubber mat is run over the blocks to bed them into the sand and bring them level.
- Jointing: dry kiln-dried sand is brushed across the surface to fill the joints fully.
- Second compaction: the plate is run again to vibrate sand down into the joints, and more sand is swept in until the joints are full. This interlock is what carries the load and stops blocks rocking.
The drive is then swept clean, with a final dressing of kiln-dried sand left to settle into the joints over the first few weeks of use.
Why the order matters and where drives go wrong
The sequence is not arbitrary. Each stage depends on the one beneath it, and the commonest driveway failures trace back to a stage that was rushed. A thin or poorly compacted sub-base is the classic cause of a drive that ruts and sinks under the wheel tracks within a year or two, because the load from a car concentrates exactly where the base is weakest. Missing or weak edge restraints let the whole field of blocks creep outwards, opening the joints and letting the laying sand wash out. Incorrect falls leave puddles standing on the surface, which in winter freeze and accelerate movement. And joints left unfilled remove the interlock the design relies on, so individual blocks rock and tip under traffic.
Two further points separate a long-lasting drive from a short-lived one. First, the finished levels must respect the house — keeping the surface well below the damp-proof course and away from air bricks prevents damp problems indoors. Second, full compaction at every granular stage is what gives the drive its strength; a base or laying course that was never properly vibrated will consolidate later under traffic. None of these are visible once the blocks are down, which is exactly why they are easy to skimp on and why a properly sequenced build is worth insisting on. A driveway laid in the right order, on a sound base, with restraints and full joints, routinely lasts decades with only occasional re-sanding.
Drainage and the planning rule on falls
Drainage is not an optional extra on a block paving driveway; it is part of the design and it changes how the surface is set out from the very first stage. Standard (impermeable) block paving sheds water off the surface, so the falls must carry that runoff to a definite destination — a linear channel drain across the front of a garage, a gully, or a permeable border such as a gravel strip or planted bed. A common detail is a channel drain at the threshold of a garage or where the drive meets the house, catching water before it can reach the building. Where water has nowhere obvious to go, a soakaway can be built to take it into the ground, subject to the soil being suitable.
There is also a planning dimension that affects how the drive is built. Under rules introduced to reduce surface water flooding, a new or replacement front driveway over a certain size that drains rainwater straight to the road can require planning permission — but it is generally permitted without it if the surface is permeable, or if the runoff is directed to a permeable area or soakaway within the property rather than onto the public highway. This is why many installers now build front drives either in permeable block paving (an open-graded sub-base and permeable jointing that let water pass down through the construction) or with the falls deliberately running to a soakaway or border. The choice between an impermeable build with positive drainage and a permeable build is made early, because it dictates the sub-base material, the jointing, and where the levels and falls are set. Getting drainage decided at the planning and excavation stage — not bolted on once the blocks are down — is what keeps the finished drive free of standing water, clear of the house, and on the right side of the rules.
Frequently asked questions
How long does it take to lay a block paving driveway?
A typical domestic driveway is often a few days to about a week, depending on size, ground conditions, the amount of cutting, and whether old surfacing has to be dug out and removed first. Wet weather can extend it.
Do the blocks get glued or cemented down?
No. Standard block paving relies on a sand laying course and kiln-dried sand in the joints to interlock the blocks, held in by concrete edge restraints. Only the edges and any drainage channels are typically set in concrete.
What pattern is best for a driveway?
Herringbone (laid at 45 or 90 degrees) is the usual choice for driveways because it interlocks strongly and resists the turning and braking forces of vehicle tyres better than simpler patterns like stretcher bond.
Sources & further reading
- Pavingexpert — laying block paving (method and detailing)
- Marshalls — how to lay block paving
- Checkatrade — block paving driveway cost and process guide
Figures on this page are typical UK ranges drawn from published sources and depend on your specific site. They are guidance, not a quotation.